>
I said that I would write a blog about this because it’s something new that I tried myself and I will try it again. I got this idea from the infamous Youtube. I love Youtube and all of the informative tutorials that are posted when it comes to new hair styles and ideas. The hope is eventually I will get the chance to start my own personal channel so I can start doing tutorials. I wanted to talk about the Duby wrap and the Invisble Part Quick Weave. As some of you already may know a quick weave is basically wefted hair that is either glued on a wig cap which is placed on top of your hair on onto your hair. There are many different ways that this can be done and the industry has made it so that you can even use something other than the bonding glue which is supposed to be safer and easier to remove (Glue Free Quick Weave blog for another day).
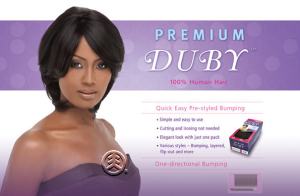
There is a new type of hair product out which is called the “Duby” which is what most of us refer to as the “roller wrap.” This product is a weave that is pre-curled and wrapped around a foam cone to preservre the curl of the hair. The hair is already curled so there is no need to curl it once you put it in. Once you start to place the tracks in place the hair will fall into pre cut layers so there’s no need to cut the hair which is just great. You can also change the direction that the hair is placed to create a flipped look as well. I love it! ♥
There are several hair lines out right now that have their own version of the duby.
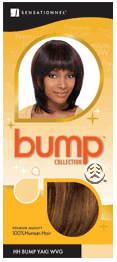
Sensationnel’s Premium Now has “The Bump Collection”
-100% human hair
-Double Tracked
-Short to medium lengths
-Wide range of colors
-They have a feathered wrap style which is single tracked
– It comes with a free closure piece that resembles a natural scalp
-It’s wrapped around a foam cone that preserves the curve of the hair
♥♥♥ Outre Premium Duby♥♥♥ (used it for an asymetrical bob syle)
-They have the “Duby Kiss”- short hair styles
-Closures are available for each style
-100% human hair
-They also have a Demo DVD video available
-They also have the Velvet Remi Hair for this product available
♥♥♥ Milky way Ole’ ♥♥♥ (used it for my invisible part quick weave)
-Made of 100% Human hair
-Available in lengths from 7″ to 14″
-Available in different colors
***All three of these lines are basically offer the same thing with the exception of different styles and colors.***
The new thing that is out right now is the invisible part quick weave and it’s basically where your natural hair part is showing and none of your hair is out. There are a lot of youtube tutorials available for directions and ideas, and you can use any type of style of hair. Here are the steps that I took when I did my invisible part quick weave. I used the Milky Way Ole’
1. I washed my hair,conditoned, and dried it
2. I parted my hair the way I wanted it.
3. I Gelled my hair down and placed it into a pony tail, dried it and took the ends of the pony tail and gelled it an upward direction, I let the ends dry.
4. I placed a stocking cap (wig cap) on my hair and started to glue the tracks on the wig cap
5.I continued to glue the hair in “U” shped directions up to the part leaving about a 1 1/2″ of space between the part (natural part) and the hair that I glueing.
6. I continued to glue until I got to the top of my head (the crown). I left a opening of about a dime size opening for the closure.
7. I cut the cap where the part was visible, so my part was visible
8. I measured hair for the part which was no bigger than about 1/2″ wide.
9. Then I started to glue those pieces on top of the other pieces until I got to the dime sized opening that I left for the closure.
10. I then created my closure which was just a small piece of hair no wider than a 1 1/2″ to 2″ long and I placed glue on the track and rolled it tight together and dried it. I flattened it in the palm of my hand spreading the hair our into a circular fan motion and I used my flat iron and pressed it until is was flat. I placed a little glue on the back and set it to place. That’s it!
It was very cute and I got a lot of compliments and it looked like my natural hair. When I got ready to remove it, I used hair spray at first and then I had to use mositurizing shampoo for the rest because most of it did not readily give in certain places. My hair didn’t break off or come out like I was afraid that it would. One thing that was suggested to me by a friend was that the next time use spritz (Pump it Up) and spritz the first stocking cap dry it and place another cap on top of that and proceed to do the quick weave this is supposed to be easier when it comes to removal. I usually do my quick weaves on a mannequin and remove them. so my hair is free from glue. Check out my Favorite Youtube Tutorials and the links below! Leave a Comment and tell a Friend! ~♥ Miss Nic♥~
This is a great website for those who want to purchase hair that you may not be able to find at your local beauty supply store!


March 19th, 2010 at 7:52 pm
>I was looking up info about duby weaves and I found your page. Great info. Also i just want to say that your page design is very cute and elegant…hence your name
May 5th, 2010 at 2:30 pm
>Looks great! Did you use 1 or 2 packs of hair?
May 5th, 2010 at 3:36 pm
>I used 0ne and 1/2 packs
September 7th, 2010 at 2:48 pm
>I did mines the same way but when it comes to maintaining, How do you make sure everything stays in place for the length of time you wear it and also what do you do with it when you sleep?
September 7th, 2010 at 6:23 pm
>For this particular style picutred above I wrapped it at night with my satin head scarf. Flat ironed in the morning
October 1st, 2010 at 3:34 pm
>FOR THIS PIC ON UR PAGE.. IS THAT DUBYHAIR YOU USED..AND IS THAT INVISIBLE PART?
October 1st, 2010 at 3:34 pm
>hi on the pic on ur page.. is that dubby hair and is that a invisible part?
October 4th, 2010 at 2:13 pm
>Yes it is the Duby Hair
December 3rd, 2010 at 9:13 pm
>Did you cut the hair any after you put it in and what products do you use on the hair to keep it looking fresh?
December 4th, 2010 at 2:42 am
>My hair is under at stocking cap for this particular look. I didn't cut any of my hair because it's not left out. I just used some silk elements styling products. It's a hair serum..I forget the name at this moment. I talk about the product under my HPOW. Thanks for visiting my blog!
December 20th, 2010 at 1:51 pm
>Very cute can u do this with jheri curl hair leaving a invisible part thanks http://SIBRINACREATIONS.AMAZINGWEBMALL.COM
December 23rd, 2010 at 5:34 pm
>Yes you can use any hair that you want to create the invisible part.
January 15th, 2012 at 5:55 pm
For the invisible part style, can all the hair be sewed in, even the top area? Or does the top part have to be glued in?
January 15th, 2012 at 9:19 pm
It doesn't have to be glued in..but I would suggest gluing it in for a sleeker finish. you can apply the gro-protect solution (Glue free quickweave solution) to prevent glue from getting on your hair.
February 6th, 2012 at 6:30 pm
Wow, you did great! I can't manage to keep sew ins in my head longer than 3 weeks because I get bored – which is a waste of money. I may try this instead. Thanks for the tutorial and pics!
November 9th, 2012 at 4:14 pm
I have 1 pack of duby and bought a pack of pink hair 8 inchs to make it full and will that work to secure a full duby and I never used a stocking cap I bought one but my 1st glue in I just geled back in pony gels my real hair upward sat under dryer and then tracked the hair in is that not a good idea I sleep overnight in conditioner none of my real hair seems damaged at all so your input please and your hair is cute cute
November 9th, 2012 at 4:20 pm
Help girl purechin96@yahoo.com before I do this pink aand black bob I need to know a few girly things if you don't mind I hate not havin a sister and youtube did not answer good enough like a real lady hope to hear from you my birthday is on 19th so you know I want this on super cute cute status so whenever you get the time let me know on here or e mail me god bless you hun thanks in advance
November 9th, 2012 at 5:31 pm
Hey Faye,
I'm going to email you in a second..I would suggest using a stocking cap, preferably two. I'm sure the conditioner got the glue out of your hair, but I would suggest using the glue free quick weave product if you don't want to use the stocking cap. When you get ready to remove it, it will slide right off when washing it. Just follow the directions.
November 9th, 2012 at 5:39 pm
Faye Send me an email at elegant.edge10@gmail.com. I tried emailing you but it came back undeliverable.
May 19th, 2014 at 3:21 am
What’s up, I check your new stuff like every week. Your writing style is witty, keep up
the good work!